Dabbing is more popular than ever, thanks to its powerful effects and flavorful rips. Dab rigs capture the efficiency of dabs with the cooling effect of bongs to get users dense and delicious clouds.
But, how do you start?
Don’t worry. Here, we’ll show you how to use a dab rig, and share a few tips and tricks that will help you along the way. We’ll also show you everything you need to dab for the first time, and let you know where to get any replacements or extra pieces.
Let’s get you started.
Benefits of dabbing
Vaping concentrates has multiple benefits, like:
1. No smoke
Inhaling any kind of smoke can be harmful to your lungs due to the ash and carcinogens it contains. When you’re dabbing you’re vaporizing concentrates at lower temperatures, getting them just hot enough to vaporize without combusting.
Since you’re inhaling vapor, you aren’t exposing your lungs to the harmful things in smoke. Instead, you get faint vapor, with a very discrete smell that doesn’t linger like smoke.
2. Better taste
Since you’re not burning anything, you don’t need to taste any harsh smoke. Instead, dabbing allows you to enjoy the full flavor of the terpenes in the vapor, especially when dabbing at lower temperatures.
A dab is also extremely dense in cannabinoids, resulting in stronger flavors than when vaporizing dry herbs.
3. Stronger effects
Whereas only 20% of dry herbs are active ingredients, wax concentrates have a density of up to 80%. This leads to stronger effects out dabbing than those you would get from smoking, allowing you to get the experience you’re after in fewer puffs.
Assemble your dab rig setup
Before you learn how to use a dab rig, you’ll need the right dabbing tools for the job. Here are the basic tools:
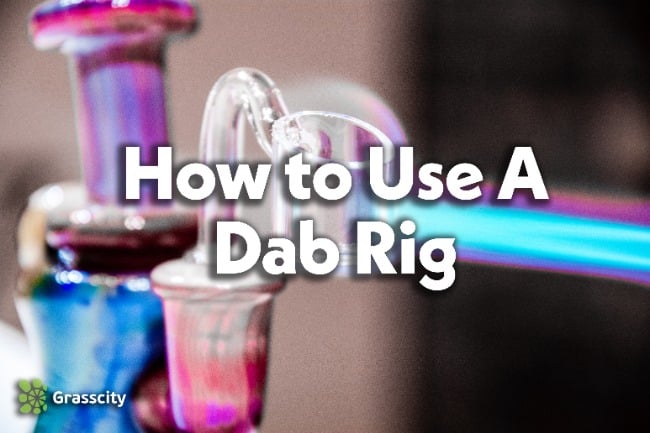
Dab Rig
Dab rigs (or oil rig) are the equivalent to bongs, but for cannabis concentrates instead of dry herbs. Most dab rigs are silicone or glass water pipes with interchangeable pieces. These allow you to replace broken parts and customize your dabbing sessions.
Although simple dab rigs only cool off dabs through the water chamber, you can find more complex dab rigs with percolators that break apart the vapor for cooler hits.
Go get a dab rig here.
Nail
Also known as “bangers”, dab nails are the heating elements. They hold the material you’ll be vaporizing, and receive the heat needed to vaporize it. They’re made out of heating-resistant materials, like quartz or ceramic, and usually come as a part of a full dab rig kit.
There are also electronic nails, which don’t require external heating devices, like this nearly indestructible one. E-nails allow you to digitally control the temperature and use your dab rig as you please without an open flame.
Take a look at more nails.
Dabbing Torch
If you don’t have an electronic nail, you’ll need a dab torch. Unlike normal lighters, butane blowtorches are perfect for dabbing thanks to the high temperatures they burn up at.
Besides a good butane torch, we suggest you keep around a can of butane fuel to recharge your torches.
Check out our dabbing torch collection.
Dabber
The dabber is a simple, heat-resistant tool that helps you manipulate concentrates. These allow you to load and unload your wax and budder without risking burning your fingers.
The right tool will depend on your material and your personal preference. There are all kinds of tools made to manipulate specific kinds of concentrate, and made out of indestructible titanium, or colorful glass.
Get your dabber tools here.
Carb cap
You don’t want to waste any concentrate, do you? Although you can use a dab rig without one, carb caps are very useful for capturing all material and getting rich and dense clouds.
Take a look at carb caps.
Your dab
A dab is a dose of concentrate, and it’s usually fairly small. Use your tools to help you cut out and separate a dab from the rest of your materials, and get ready to use your dab rig.
How to use your dab rig, step by step
Got all your tools? Here’s how to use them:
1. Secure the nail
You’ll first want to secure it to the dab rig. It’s usually as easy as connecting it into the joint, just like you’d do with a bong.
However, keep in mind this is the only time you’ll be able to secure the nail without checking its temperature. Once you start dabbing, you’ll need to be mindful of the extremely high temperatures that you’re using when manipulating your banger.
2. Heat up the nail
Once the nail is properly placed onto your dab rig, you’ll need your heating element to heat up your nail, like a dabbing torch.
Apply the flame of the torch directly to the nail, and focus on uniformly heating it up for about 30 seconds. Quartz bangers usually get an orange or red glow once they’re heated. You can also purchase nails with color-changing elements to get a more accurate sense of the nail’s temperature.
3. Wait for the nail to cool down
You probably don’t want to take a dab immediately after you’ve heated up the nail. Instead, wait for a few seconds under a minute for a quartz nail, or about 10 seconds with a titanium nail until it reaches your desired temperature.
Low-temperature dabs result in better-tasting rips that are perfect for beginners. High-temperature dabs result in denser, more concentrated clouds. Switching between temperatures allows you to target different terpenes, giving you slightly different effects.
4. Take a dab
Now that the nail has cooled off a bit, use your dabber to grab a small fragment from your material, and place it inside the hot nail. Twist the dabber tip onto the nail to ensure you’re leaving all the material behind. You can cover your banger with a carb cap to help you vaporize your concentrate and control the airflow. Then, place your lips on the mouthpiece, and start slowly inhaling.
Ideally, the dab should be small enough for you to vaporize and inhale the whole amount. You should see the vapor fill your dab rig, traveling from the nail and into your mouth. Then, exhale without holding the vapor in your lungs.
You can keep loading material to dab until you get the experience you’re after.
How to clean your dab rig
Clean dab rigs enhance your dabbing experience and help ensure your piece lasts for longer. To clean your dab rig, you can use isopropyl alcohol, and some pipe cleaners or q-tips. Specialized cleaners also help reduce the amount of time you’ll need to spend cleaning.
Start by wiping off any residues with your cotton swab right after dabbing. Then, you can empty your water chamber and fill it up with rubbing alcohol. Close the holes and shake vigorously for a few seconds, then leave it soaking for about an hour to clean. You can meanwhile clean your dabber, nails, and everything else in your setup.
Alternatively, use special glass cleaning solutions if you don’t want to wait and instead want to shake the piece and clean it off immediately.
Final Thoughts
Dabbing is easy, if you know how to do it. Now that you know how to use a dab rig, we’re sure you’ll end up loving it.
Need any dabbing tools or products? Take a look at our dabbing gear at Grasscity.

Ramon van Wanrooij - Managing Director - LinkedIn
Ramon is a well-known face in the cannabis accessories industry. As the managing director of Grasscity, Ramon is in charge of all the daily operations. He started working for Grasscity in 2014 as the Manager Supply Chain and is currently overseeing, besides his role at Grasscity, the global supply chain of High Tide Inc. Under his supervision, Grasscity, the best-rated online headshop, has shipped over a million bongs worldwide. Ramon is born and raised in Amsterdam, a.k.a. the “Grasscity”, and is educated in e-commerce, supply chain management, and cross cross-cultural management. He is an avid user and passionate expert on smoking accessories, who loves to educate the world about the latest innovations, product tips, guides, and other important information regarding using weed.